Showing posts with label Gluten-Free. Show all posts

4.21.2011

Ode to Curry Gold

Ode to Curry Gold at Sweetgreen
Inspired by Maya Angelou's Phenomenal Women

Fast food joints wonder where your secret lies.
You’re not processed or built to suit a ‘value’ meals size
They think you're selling healthy lies.

I say,
It’s in the reach of my warriors
The span of my long run,
The stride in my fartlek,
The curl of my biceps.
You’re curry gold
Phenomenally.
Phenomenal curry gold.
That’s you.

I walk to where you are
Just as cool as the FroYo I see
And to the fast food man across the street,
That stands or
Falls down to his knees,
His media swarms around me,
Yet tired and clogged arteries are all I see.
I say,
It’s the curry in the dressing,
And the almonds toasted just right,
The spring in my spinach,
And the joy of cucumbers so light.
Your curry gold,
Phenomenally.
Phenomenally curry gold,
That’s you.

The man himself has wondered
What I see in you.
They try hard to live without a deep fryer
But sweetened injections can’t touch
Your simple roasted chicken
When I show them your ingredients there's no mystery
They say they still can’t see
I say,
It’s within this chefs clean eating habit,
The sun on your beets,
The spice of your curry,
My healthy lifestyle complete
Your curry gold
Phenomenally.
Phenomenal curry gold,
That’s you.

Now they understand
Just why there's always a line
You don’t shout or jump about
Although sometimes your stores' music is just plain too loud
When you see me passing
It ought to make you proud.
I say,
It’s in the beep of my Garmin,
The bend of my wheel,
The prayer at my hearts center,
My choice to care,
‘Cause your curry gold
Phenomenally.
Phenomenal curry gold,
That’s you.

Recipe: Mock Curry Gold
  • 2 c. spinach
  • 1 small chicken breast, roasted, small dice
  • 1/4 c. cucumber, small dice
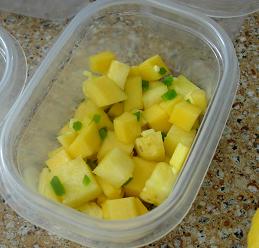
  • 1/4 c. pineapple, peeled, small dice
  • 1/4 c. beets, peeled, small dice
  • 2 T. almonds, slivered, toasted
  • 2 T. cranberries, dried, unsweetened
  • 2 t. evoo
  • 2 t. curry powder
  • salt and pepper to taste
  1. In a large bowl, toss together spinach, chicken, cucumber, beets, pineapple, almonds, cranberries until combined.
  2. In a small bowl, whisk together evoo, curry powder, salt, pepper and drizzle around edges of large bowl with salad. Gently fold and toss salad with tongs.

4.20.2011

Article & Recipe: Quinoa...your Passover loophole?

Going through grain withdrawal this passover?


And here is one of my favorite side dishes for red quinoa:

Recipe: Red Quinoa with Swiss Chard & Toasted Chickpeas
  • 1 c. red quinoa, gently rinsed
  • 3 c. veggie stock
  • 1 (16 oz.) can of chickpeas, drained and rinsed
  • 1 bunch of red swiss chard, ribs removed, chiffonade
  • 2-3 T. evoo
  • 1/4 c. combo of garlic, onions, bell peppers, brunoise (based on your preferences)
  • 1 T. oregano, minced
  • 1-2 t. sherry vinegar
  • salt and pepper to taste
  1. Fill a medium pot 3/4 with half water and half veggie stock, bring to boil and sprinkle with salt.
  2. Bring another pot to a boil, filled 3/4 with water and generously sprinkled with salt.
  3. Preheat oven to 400, when hot, place chickpeas in sided baking dish, spray with canola oil, sprinkle with salt, pepper and place in oven to bake until toasted and crispy (about 30 minutes).
  4. Add quinoa to 1st pot of veggie stock-boiling water, turn down to 'gently' boil until grain just begins to sprout, about 10-15 minutes. Strain grain from liquid and set aside.
  5. Prepare an ice bath in a large bowl with 1 part ice and 3 parts water, set aside.
  6. Add swiss chard to 2nd boiling water pot to blanch (about 30 seconds to 1 minute), strain from pot and dump into ice bath until swiss chard is cooled (about 30 seconds), strain from ice bath, gently squeeze excess liquid from swiss chard and set aside.
  7. In a saute pan over medium high heat, add about 1 T. evoo until hot and almost smoking, then stir in garlic, onions, bell peppers and saute until translucent and golden brown on edges (about 1-2 minutes) then stir in swiss chard, tossing to coat, remove from heat and dump into large bowl.
  8. Add cooked quinoa to large bowl, gently toss with 1-2 T. evoo, oregano, vinegar, salt and pepper to taste.
Check out another one of our quinoa recipes here!

9.11.2010

Recipe: Yakima Valley Featured Product

What a surprise to get this e-recipe, via vegetarian times that pays a little homage to my homeland, the Yakima Valley. The recipe is from Cafe Flora, a vegetarian restaurant in Seattle that features this cherry-polenta dish, crafted from ingredients provided by a Yakima farmer, Merv Dykstra.

I don't know Merv, but it sounds like he's been doing pretty well for a while now, supplying ingredients to many Seattle area restaurants.

The recipe is great...sweet, savory...good for an appetizer, an unusual dessert or an interesting substitute for a cheese course. When I prepared it for myself, I even bought the cherries from the Old Town Alexandria Whole Foods, which are from Selah, my hometown in the Yakima Valley.

7.02.2010

Recipe: This Weeks Favorite - Grilled Mahi Mahi Corn Tacos with Brazilian Collard Greens, Lime Scented Slaw and Avocado Salsa

In a regular work week, I can prepare over 300 recipes - be it sauces, sides, salads, etc. This can make it difficult for me to motivate myself to prepare dinner for my family everynight. But without fail, there are some things that look and smell so good when I am preparing it for my client, that I'll think about it constantly until I can prepare it for myself!

Grilled Mahi Mahi Corn Tacos with Brazilian Collard Greens, Lime Scented Slaw and Avocado Salsa
  • Hard or soft shell corn tacos
  • 8 oz (about 1/2 lb) mahi mahi filet (skin and center bone removed), cut into large, bite sized pieces (so they fit in your tacos)
  • 2 1/2 T. ground cumin
  • 1/2 T. ground coriander
  • 2 t. cayenne or chili powder
  • 1/4 c. cilantro, minced
  • 2 T. parsley, minced
  • 2 T. canola oil
  • 1 small sweet yellow onion (1/4 of the onion is diced, the other 3/4 is thinly sliced)
  • 1 head of garlic, minced
  • 1 bunch of collard greens, stems/ribs removed, rolled longways (like a towel) and thinly sliced
  • 1 small green cabbage, thinly sliced (outer edge - about 1" - only)
  • 4 limes, juice and zest separated
  • 1 avocado, smashed
  • 1 plum tomato, diced
  • salt and pepper to taste
  1. Bring a medium pot, filled 3/4 of water to a boil, generously add salt.
  2. In a saute pan over medium high heat, add 1 T. canola oil, when hot, add about 3/4 of the thinly sliced sweet yellow onion and all the garlic (except about 1 t.). Saute onions and garlic until golden brown on edges, then deglaze the pan with chicken stock or water, bring to medium boil until au sec (pan is dry) and remove from heat.
  3. Drop sliced collards into boiling water until bright green and slightly wilted (about 1 minute). Strain from water, stir in caramelized onion-garlic mixture, 1/2 t. cumin and 1 t. cayenne (or chili powder), set aside.
  4. Heat your grill pan or outside grill.
  5. In a medium bowl, add salt, pepper, 1 T. canola oil, mahi mahi, 1 T. cumin, 1/2 T. coriander, 1 t. cayenne (or chili powder), 1 T. cilantro and zest from 2 limes. Toss mixture and place on grill for about 2 minutes on each side, remove from grill and set aside.
  6. (If you use soft corn tacos, heat then on the grill for about 2 minutes each side)
  7. In a large bowl, toss together cabbage, remaining sliced onions, 2 T. cilantro, 1 T. parsley, juice from 3 limes, zest from 1 lime, salt and pepper to taste and set aside.
  8. In a small bowl, combine mashed avocado, diced tomato, remaining diced onion, (about a teaspoon of) garlic, 1 T. cumin and 1 T. cilantro, salt and pepper to taste.
  9. Build tacos with collards, mahi mahi, cabbage slaw and avocado salsa to enjoy! 

10.24.2008

Recipe: Fall Inspired Creme Brulee

Butternut Squash Creme Brulee
  1. Preheat oven to 325.
  2. In a medium bowl, combine until well mixed: 1/3 c. granulated sugar, egg yolks, butternut squash puree, pumpkin pie spices, vanilla paste, set aside.
  3. In a medium pot over medium low heat, heat heavy cream until cream just starts to bubble up. Remove from heat.
  4. Quickly whisk hot cream into sugar-butternut squash puree mixture until combined and emulisfied.
  5. Using a ladle, pour mixture into creme brulee dishes, place in sided baking dish (cookie sheet or casserole dish) and place in oven. Carefully fill up a cup with warm water and carefully pour warm water into cookie sheet/casserole dish to create a water bath.
  6. Bake for 30-45 minutes until custard is set.
  7. Remove from oven, remove custard dishes from water bath and set aside to cool to room temperature.
  8. In a small bowl combine 4 T. granulated sugar and 1 T. brown sugar. Sprinkle mixture over each custard and torch. Serve immediately.
This recipe is inspired by a Williams-Sonoma recipe I did at the Galleria Williams-Sonoma store in Tysons Corner (November 2006) to showcase their butternut squash puree - and the participants really enjoyed it!

8.08.2006

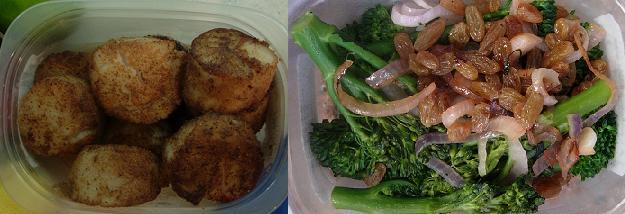
Recipe: 5-Spice Seared Scallops with Garlicky Broccolini, Golden Raisins & Pine Nuts with Pan Sauce


I went to dinner at Ceiba with my husband and some of his friends from out of town. I was in a bad mood when I arrived because I was about an hour late (attempting to drive from Potomac, MD to 14th and F at 5:45pm on a Tuesday), not to mention arriving to find that it was an all male dinner and they politely waited for my arrival. I felt terribly guilty. But all my paranoia and frustration went away when I saw the combination of seared scallops, 5-spice, Broccolini and golden raisins. It was a mood lifter and hopefully when I make my 5-Spice Seared Scallops with Garlicky Broccolini, Golden Raisin & Pine Nut Saute with Pan Sauce for my clients – it gives them a little positive breeze as well.
On a side note: Ceiba has really great (and most importantly FRESH) Ceviche – it is only number two in my mind to Zengo – which is more interesting in flavors (due to their Asian-Latin fusion thingy). If you like Ceviche or if you have been scared to eat raw fish cooked with citrus juices – these are the two places to ensure a delicious and safe meal.
5-Spice Seared Scallops with Garlicky Broccolini, Golden Raisin & Pine Nuts Saute with Pan Sauce
(serves 2)
  • 10 Sea Scallops, fresh with muscles still on the side
  • 4 T. 5-Spice
  • 4 T. unsalted butter
  • 2 T. canola oil
  • 5 gloves of garlic, roughly chopped (or subsitute spanish onions if you don't like garlic - as pictured above)
  • 1 bunch of Broccolini
  • 1/4-1/2 c. golden raisins
  • 1 c. chicken stock
  • 1/4 c. pine nuts
  • salt and pepper to taste.
  1. Preheat oven to 400 degrees, place pine nuts on cookie sheet, spread them out and place in oven (middle rack or place them as close to the middle as possible)to bake for 5-10 minutes (depends on your oven) until toasted and golden brown. Make sure to remove them from the cookie sheet when golden brown and set them aside.
  2. Bring a medium pot to a boil and add 1 T. salt. Cut the rubber bands from the Broccolini and drop them in the boiling water to boil for at least 1 minute until they are bright green and the stalks are partially cooked through. Strain from the water and plunge the Broccolini into an ice bath until cooked, then remove and set aside.
  3. Place the scallops in a bowl, remove the side muscle and sprinkle over salt, pepper, 5-spice, toss to coat. Heat a saute pan to high heat until almost smoking, drop in 2 T. butter and 2 T. canola oil until melted and crackling, carefully drop in scallops and sear until golden brown and caramelized (do not touch once you place them in the pan - let them caramelize!) about 2 minutes, then flip and caramelize/sear the remaining side (about 2 minutes). Remove saute pan from heat and take out scallops from the pan and place on cookie sheet, cover with foil to keep warm.
  4. Using the same pan (as long as you didn't burn it up), add 2 T. butter and swirl the butter around to deglaze the pan a little, add the garlic, saute until starting to turn golden brown, add chicken stock, raisins, pine nuts to deglaze pan, while cooking the garlic through. Reduce the sauce by half, add salt, pepper and the broccolini to warm it (about 1-2 minutes), tossing it gently in the sauce.
To Serve: Using tongs, place broccoli in center of plate, vertically from top to bottom. Top with scallops in a line, vertically on top. Spoon garlic, raisin, pan sauce mixture over and around scallops to enjoy.
Want to add some spice? Add some chopped red thai chiles when you cook the garlic - it'll pack a punch!

6.24.2006

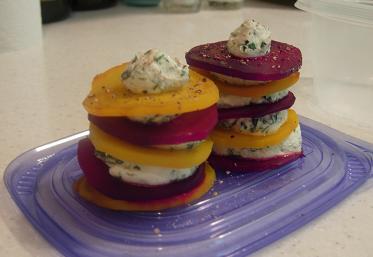
Recipe: Beet & Goat Cheese Napoleon


Here is a aesthetically pleasing way of serving a beet and goat cheese salad - which can be prepared a few days ahead and chilled in tupperware before your next summer dinner party. But don't forget the plastic gloves! You do not want your guests joking over and over - "that you've been caught red handed". Just ask your meat department counter person at Whole Foods/Wegmens/Balducci's to give you two pairs, then you don't have to buy a full box from your local hardware store.
Beet & Goat Cheese Napoleon
(serves 4)
  • 2 Golden Beets (largest you can find)
  • 2 Red Beets (largest you can find)
  • 4 oz. Goat Cheese
  • 1/4 c. heavy cream
  • 1/2 T. tarragon, chopped
  • 1/2 T. parsley, chopped
  • 1 t. cardamom, ground
  • 1 beligan endive, green
  • 1 beligan endive, purple
  • 1/2 T. dijon
  • 1/4 c. evoo
  • 4 T. Red Wine Vinegar
  • salt and pepper to taste
  1. Bring 2 medium pots, filled with water to a boil. Add 1 T. of salt and 3 T. of sugar to each. Trim beet greens and set greens aside. Carefully drop yellow beets in 1 pot and red beets in the other. Boil for 10-15 minutes until a paring knife slips through center of beet with little to no resistance. Strain beets from liquid and place gold beets in ice bath and red beets in another ice bath, until cooled (about 10 minutes). Put on plastic gloves and over a paper towel, carefully rub your gold beets, the skin will slide right off. Then change gloves and do the red beets.
  2. Slice the beets on a mandoline and set aside. Using a circle mold that is small enough to cut circles in the beet slices (about 2 inches in diameter), pile the slices of red beets in piles of 4-5 and cut with circle mold to create perfect circles. Wash circle mold and continue with the same process for the yellow beets.
  3. Combine goat cheese, creme, tarragon, parsley, cardamom, salt and pepper to taste and whisk until combined. Carefully roll goat cheese into little balls, about 1/2 inch in diameter and set aside.
  4. Lay out 4 slices of red beets and top each with 1 goat cheese ball. Top goat cheese balls with 4 slices of yellow beets, then continue with goat cheese, red beet slices, goat cheese, yellow beet slices, goat cheese, red beet, finishing with goat cheese. Using a spatula, place beet and goat cheese napoleons in tupperware to refrigerate until serving.
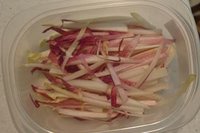
  5. Cut 1/2 inch of bottom of beligan endive and pile leaves (4-5 high) on the cutting board, vertically. Carefully slice in juliennes, then place in tupperware, fill tupperware with water and cover with a damp papertowel, then tupperware lid, place in refrigerator until service.
  6. Combine mustard, vinegar, salt and pepper in a small bowl, whisk until salt is dissolved and then run in evoo while whisking to emulsify vinaigrette. Place in small tupperware and refrigerate until service.
To Serve: Remove napoleons, vinaigrette and endive from fridge at 15-30 minutes before you plan to serve the salad. In a medium bowl, toss julienned endive with mustard vinaigrette and lay in center of plate. Flatten down endive to create a little bed to sit the napoleon on. Using a spatula, remove napoleon from tupperware and place in center of plate, in center of endive. Sprinkle with sea salt and drizzle extra mustard vinaigrette around the edges of the endive, close to the edges of the plate to enjoy.

2.06.2006

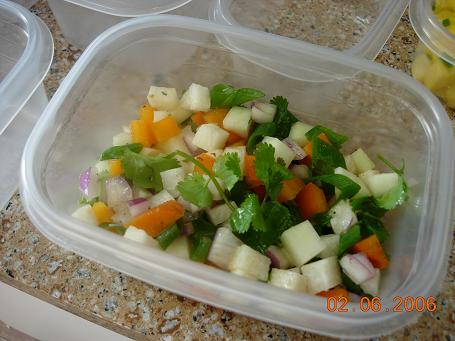
Recipe: Carribean Salad with Mango Pineapple Garnish

Carribean Salad with Mango Pineapple Garnish

A little bell pepper, green papaya, cilantro...what could be more refreshing. Toss it with some mache, top it with a grilled chicken breast and you have a very filling, very healthy dinner.
  • 1/4 cup of chopped bell pepper (a little red, a little orange)
  • 1 Jalapeno, seeded and brunoise
  • 1/2 cup chopped jicama
  • 1/4 cup loosely packed sprigs of cilantro
  • 1 tablespoon of slivered green onions
  • juice of 1 lime
  • 1 Tablespoon of canola oil
  • 1/4 cup silvered carrots
  • butter lettuce
Garnish:
  • 3 Tablespoons of chopped mango
  • 4 Tablespoons of pineapple chunks
  • Extra jalapeno if you like
  1. Prepare salad ingredients and combine.
  2. Prepare garnish ingredients and combine.
  3. Serve salad a top butter lettuce. Garnish with 'garnish'.

2.01.2006

Recipe: Starfruit & Pineapple Salad with Ginger Pineapple Vinaigrette


Starfruit & Pineapple Salad with Ginger-Pineapple Vinaigrette
Utilize the exotic fruits that are coming up from South America - fruit is always in season somewhere in the world and we are lucky enough to live near a whole foods that provides us with this stuff!
There is no acid (lemon juice, vinegar) in this vinaigrette, because there is enough acid in the pineapple juice and the pineapple chunks to take the place of it.
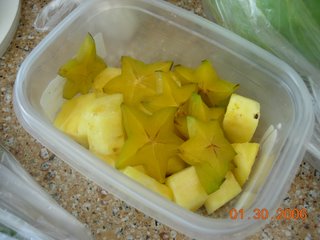
  • 1 Medium Sized Star Fruit
  • 1 Cup of Chopped Pineapple
  • Danelion Greens
  • Watercress
  • 1 Tablespoon of Minced Ginger
  • 1 Cup of Pineapple Juice (Not from a can - get a good bottle of juice with pineapple in it)
  • 6 Tablespoons of Evoo (Extra Virgin Olive Oil)
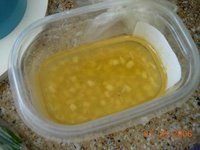
  1. Place pineapple juice in pot and bring to a boil. Let boil until reduced at least by 3/4, creating a syrup'y - sauce consistancy. Remove from heat and let cool.
  2. Chop ginger and add to cooled pineapple syrup.
  3. Whisk in extra virgin olive oil to pineapple syrup and your vinaigrette is done.
  4. Slice starfruit and combine with pineapple chunks.
  5. Clean Dandelion greens and watercress and combine.
  6. Toss greens and fruit in vinaigrette and serve.

1.27.2006

Recipe: Caramelized Pineapple with Pomegranate Reduction

Caramelized Pineapple with Pomegranate Reduction

Don't cut treats completely out of your life because you want to be on a diet. Just replace your nightly ice cream ritual with some fruit - or even dress it up with a brulee torch.
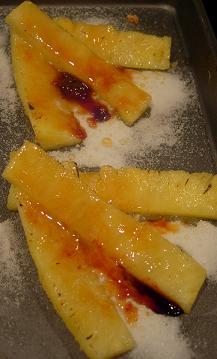
  • Pineapple, sliced in long strips (3-5 inches), 1/2 inch slices
  • 2 Tablespoons of fine granulated sugar
  • 1 cup of POM Juice
  1. Pour your pomegrante juice in a small pot and bring to a boil. Reduce by 3/4 until it reaches sauce consistancy. Remove from heat and let cool.
  2. Lay out pineapple slices on sided cookie sheet (you may want to cover it with foil if you are worried about removing the caramel later).
  3. Get your torch ready and sprinkle sugar, very lightly over 1 pineapple slice, then torch that slice, continue with sugar, then torch on remaining pineapples. Let caramel cool enough to handle.
  4. Place pineapple pieces on plate and drizzle pomegranate reduction over and around pineapple to serve.
When you are brulee'ing pineapple, you don't want to do more than 1 slice at a time because the juice in the pineapple will absorb the sugar and once sugar is wet, it becomes nearly impossible to caramelize.

1.17.2006

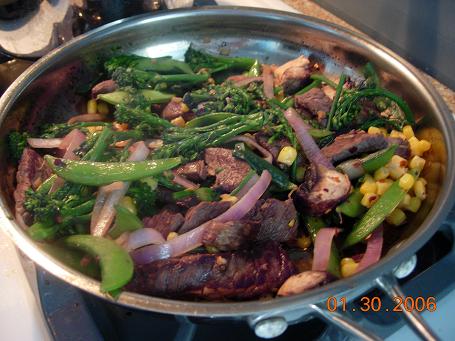
Recipe: Asian Broccoli, Corn & Mushroom Stir Fry


Asian Broccoli, Corn & Mushroom Stir Fry
(Serves 2)

A little asian marinates or oils can change a person who doesn't eat broccolini into someone that does.
  • 1/2 bunch of broccolini, blanched
  • 1/4 cup of fresh corn kernels (can be frozen)
  • 1 portabella, top skin peeled and chopped in bite sized pieces
  • 5-7 sugar snap peas
  • A few slices of onion (depending on your preference toward onions)
  • 1 Tablespoon of chopped garlic
  • A shake or two of red pepper flakes
  • 1 Tablespoon of sesame seed oil
  • Squeeze of lime
  1. Heat a wok or saute pan to high, when really hot, add a Tablespoon of Canola oil until hot and 'running' around the pan.
  2. Add the onions and saute until translucent, then add garlic and portabellas and saute until mushrooms have released most of their liquid.
  3. Add broccolini, sugar snaps, corn kernels, until heated through, then remove pan from heat.
  4. Dash in red pepper flakes, sesame seed oil and lime juice.

1.03.2006

Recipe: Truffled Gratin Potatoes


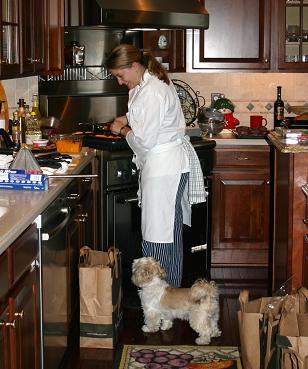
I often tell clients that I would appreciate it if they limited their time to the kitchen while I am working. Although sometimes, I need a kitchen assistant and who could be better then a sweetheart like Baily as you see here helping me out in the kitchen the other night on New Years Eve. Baily is a great helper and it was really great having some company in the kitchen while I prepared his families New Years Eve dinner.
Here is a recipe from the event that I think you will enjoy. I also included some directions on how to prepare the gratin over 2 weeks ahead of time and then re-heat it 'personal chef' style - and believe me, no dinner party guest will ever be able to tell.
Truffled Gratin Potatoes:
(Serves 4-6)
Ingredients:
  • 2 Cups Heavy Cream
  • 2 Tablespoons of Unsalted Butter
  • 8 Baking Potatoes, Skinned and Sliced on a Mandoline (Thinnest Setting Possible)
  • Salt and Pepper (to taste)
  • 4 oz. Truffle Oil
  • 6 oz. of Gruyere Cheese, Shredded
  • 4 oz. of Parmesan Cheese, Shredded
  • 2 Tablespoons, Finely Chopped Black Truffles (from a Can)
To Make Truffled Potato Gratin:
  1. Preheat oven to 400 degrees.
  2. Prepare gratin baking dish: For a tall gratin, use a bread pan. For a shallow gratin, use a 9”x9” square pan. Cover pan with 1 large piece of foil and fold over sides of pan. Spray foil with non-stick cooking spray, whip out any excess and set aside.
  3. Pour crème into large bowl and set aside.
  4. Cut up butter into ‘pea’ size pieces and set aside.
  5. Peel potatoes and place in large bowl filled with water, so that potatoes are completely submerged.
  6. Put mandoline on thinnest setting possible and lay over crème filled bowl. Remove 1 potato at a time from the water bowl and slice potato through mandoline into crème. Between each potato, carefully flip slices in bowl around to make sure each is coated with crème.
  7. Pour truffle oil into a shallow bowl and set aside.
  8. Place gratin dish in front of you and start to layer in potato slices. First fan slices, overlapping each by half, from left to right. Sprinkle lightly with pepper, salt and about 2 Tablespoons of gruyere.
  9. Continue with next layer of gratin from top to bottom, followed by a light brushing of truffle oil over the potatoes and sprinkle 2 Tablespoons of shredded gruyere.
  10. Every third layer of gratin, place 3 pea sized pieces of butter evenly over gratin and sprinkle about a tablespoon of chopped black truffle over gratin and gently press down on gratin to insure you are stacking the layers as tightly as possible.
  11. Alternate gratin directions 7 and 8 until you finish with last of the potatoes or ½” from the top of the gratin dish, whatever comes first.
  12. Top with parmesan and chopped black truffle, place gratin dish on a sided cookie sheet and place in oven to bake for 30-45 minutes.
  13. To check doneness of gratin: Remove from oven and run butter knife through center of gratin; if knife slips through with little to no resistance, gratin is ready. If gratin is becoming too dark for you: Cover with foil and return to oven until cooked through.
  14. Remove from oven, slice into desired pieces and lift out with spatula.
To Store Truffled Potato Gratin: Remove gratin from oven and let cool completely. Carefully ‘lift’ out foil from gratin pan – and place on cutting board. Using a slicer, carefully slice gratin in desired pieces and place in Tupperware. Sprinkle each piece with a little gruyere or parmesan and cover to refrigerate (for up to 5 days) or freeze (for up to 2 weeks).

To Serve Truffled Potato Gratin: If gratin has been frozen, please defrost it in the fridge at least 24 hours before you plan to re-heat it to enjoy. Remove Tupperware top and cover with a paper towel. Place in microwave to heat for 3-4 minutes until heated through and butter knife slips through center of gratin with little to no resistance.

12.28.2005

Recipe: Creme Brulee


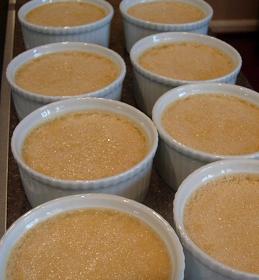
The creme brulee is probably the most popular dessert in Europe and America - simply because it is difficult to visit a fine dining establishment that does not offer a version of it on the menu. It is so popular simply because it has it all: yummy, rich custard, utlra creamy and tinted with whatever flavor you desire (usually vanilla); hidden under a layer of sweet, crunchy caramelized sugar (picture to left has brulees that have not been brulee'd yet), cutting and complimenting the richness of the custard. After writing this, I could have one right now....
Another thing you probably didn't know is that you can prepare creme brulees days in advance and just brulee (burn the tops) them right before you want to serve them. If you didn't know - 99% of all restaurants make their creme brulees like this. Some even brulee them hours before you order it and just stick it in the fridge. Sad but true. But then again, if they do it why can't you? Therefore I have added some storage and re-heating tips to this recipe.
Creme brulees are super impressive to serve at your next dinner party - and they are much easier to make than you think - really it is only about 15 minutes in kitchen time and then you can pop them in the oven and go on your way.
BUT - there are only a few things you must do to ensure that you make great creme brulees:
  1. Take the temperature of your oven;
  2. Place a thermometer in your oven and turn your oven to 300 degrees. Check it 20 minutes later and see if the thermometer says 300 degrees;
  3. Then check the oven 40 minutes later and ensure that it still says 300 degrees.
I know you think I am joking, but a oven that is 20 degrees too hot - and you will end up with scrambled eggs, floating on the top of warmed vanilla milk in your creme brulee dishes...and if your oven is 20 degrees too cold, you're brulees will take 5 hours to cook or may never even cook at all.

Makes about 8 Standard Individual Creme Brulees
Ingredients:
  • 2 c. heavy crème
  • 6 yolks
  • 2.5 oz. sugar (about 3/4 c.)
  • 4 T. vanilla (I like the paste, you get the seeds and the intense vanilla flavor of the extract)
  • liquor (optional - but a few tablespoons of grand mariner sure gives it an elegant punch)
  1. Preheat oven to 300 degrees.
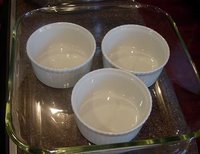
  2. Lay out 8 brulee dishes in a sided, oven safe, casserole dish; then pour water into the casserole dish, making the water at least a 1/4 inch to a 1/2 inch deep.
  3. In a bowl, whisk eggs, sugar and liquor together until combined. Set aside.
  4. Warm creme on stove top until it starts to bubble over, remove from heat and let cool for a minute or so.
  5. Wrap a towl around your egg-sugar mixture bowl and place it on the counter - simply to keep your bowl from moving around. Slowly pour the warm creme into the egg-sugar mixture while whisking the egg-sugar mixture, making sure that the creme is combining and emulsifying completely.
  6. Using a wooden spoon, gently stir the custard for a minute or two - this will allow the air bubbles to rise to the top and pop, so you'll have smooth and creamy custard without air holes later.
  7. Ladel custard into creme brulee containers, leaving only an 1/8 inch at the top.
  8. Place in oven to bake for about 30 - 45 minutes until completely set and when touched in the center, the custard is 'springy'.
  9. Remove from oven and let cool.
  10. Wrap each individually in plastic wrap and refrigerate. These will be fine in the fridge for up to 4 days.
  11. When you are ready to enjoy. Remove from fridge and sprinkle 2 Tablespoons of granulated white sugar on top of 1 brulee, spread out the sugar so it is evenly coated on the custard.
  12. Start your torch and slowly move the torch (about 1 1/2 inches from the custard) in a circular motion around the brulee until all the sugar is crystalized.

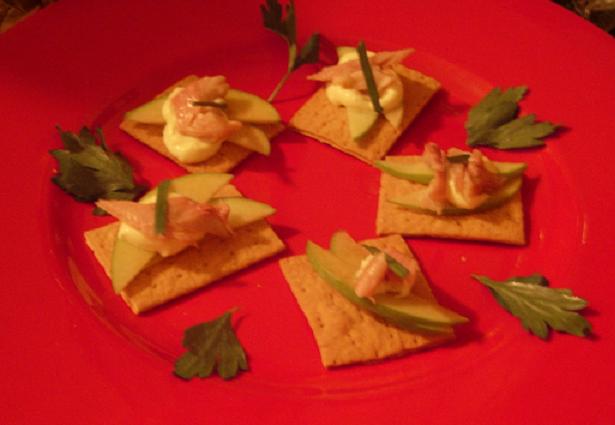
Recipe: Smoked Trout & Apple Bite


A very popular appetizer that takes 2 seconds to prepare and has quite a punch of flavor with the smoky trout and sour granny smith apple.
Makes 10-20 (depending on how big you make them)
Ingredients:
  • Smoked Trout (1 small fish)
  • zest from 1/2 lemon
  • picked parsley leaves (for garnish)
  • snipped chives (2 chives)
  • 1 granny smith apple (quartered and thinly sliced on mandoline)
  • 1 teaspoon of creme fraiche per bite (1 - 8oz. package of creme fraiche)
  • crackers (light and plain in flavor - I enjoy these starr ridge crackers, specifically olive oil flavor - they are mild with a great olive oil after taste)

Pile cracker, a few slices of apple, a little piece of smoked trout, a dollop of creme friache, a pinch of lemon zest; topped with 1 inch snip of chives. Garnish plate with parsley leaves. You're done!

11.27.2005

Recipe: Chocolate Covered Strawberries


Talk about easy...impressive...and everyone loves them.
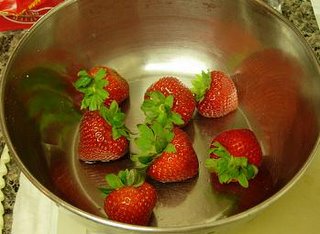
You cannot fail at these at long as you use good quality chocolate (here is a great website that explains everything you would ever want to know about chocolate and more importantly, quality chocolate), don't burn it and fresh strawberries that aren't over ripe.
I will not go into the 'tempering' of chocolate - as that is a whole article in itself. I'll just say that tempering chocolate is esstentially breaking down the chemical compond of chocolate with a varied degree of temperature in order to produce (melted) chocolate that will eventually harden, therefore producing the chocolate in a new 'chemical state' for the baking purpose you desire. Yeah, I think most pastry chefs study this stuff for weeks - then putting it in practice is a whole different thing! Here is a quick an easy few paragraphs to read if you are interested about tempering. I googled around for a more serious description, but most were more generalized them what I mentioned above. So I guess that gives me something to write an article about later.

Recipe: Chocolate Covered Strawberries
  • 11 oz. or more (is enough to double-dip 8 medium sized strawberries)
  • 8 Medium Sized Strawberries
  1. Wash and dry your strawberries.
  2. Set them on a sheet tray, covered with wax or partchment paper.
  3. Place a sieve inside a medium sized pot. Fill up the water in the pot so that the water line sits just below the sieve.
  4. Place the pot on the stove and bring to a boil.
  5. Meanwhile, chop up chocolate into very small pieces - no larger than a tablespoon.
  6. Place the chocolate in a metal bowl (that will fit nicely in the sieve).
  7. When the water is boiling, place the chocolate filled bowl into the sieve and let the chocolate melt.
  8. After a minute or two, gently stir the chocolate, moving it around the bowl, scraping the edges, helping it melt and circulating it, so that it doesn't burn.
  9. When 90% of it melted, remove the bowl from the sieve and quickly dip the strawberries into bowl, covering 80%. When you pull out the strawberry, give it a little shake to remove any excess chocolate, then lay on sheet tray. Continue with remaining strawberries.
  10. Let the strawberries sit at room temperature (around 65-70 degrees) until you plan to serve them (within 6 hours).
You are welcome to double-dip the strawberries. Just wait about 15 minutes after the first dip - while the first layer of chocolate starts harden. Then heat your chocolate again over the boiling water and do the process over again (steps 7-9).

Recipe: Mascarpone Stuffed Dates


Recipe - Mascarpone Stuffed Dates
Ingredients:
  • 6 Dates
  • 6 Tablespoon of Mascarpone
  • Salt and Pepper
  • Chives, Chervil or even minced Candied Orange Peel for Garnish
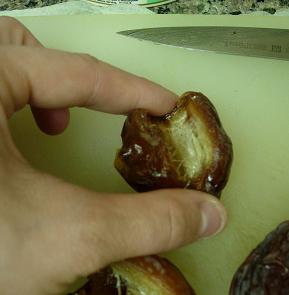
  1. Using a pairing knife, cut half way through the date, from tip to tip.
  2. Pinch the ends of the date, so it opens up and you can easily remove the seed.
  3. Prepare piping tip in bag and fill with mascarpone.
  4. Fill dates from tip to tip with about 1 Tablespoon of Mascarpone per date.
  5. Snip chives into ½ inch pieces.
  6. Place chives on top of mascarpone, in an ‘X’ for garnish.
Refrigerate until about 1 hour before you plan to serve, then remove and let come to room temperature.

Other ideas for serving this?
  • Use a piping tip to change the shape of the mascarpone in the date.
  • De-seed dates, place in oven at 400 degrees for 8-10 minutes. Remove and let cool enough for handling. Fill with mascarpone and serve slightly warm.
  • Great as a petit four or on a cheese platter.

Recipe: Vanilla Bites


This recipe is an adaption from the Book Amuse Bouche by Rick Tramonto. It really is a great example of combining all tastes (sweet, sour, bitter, salt) to form a perfectly flavored bite.
People either love it or hate it - and it is usually only loved at dinner parties where the eaters are adventurous - so you might want to take what can your guests are before serving this.
Recipe - Vanilla Bites:
  • 1 ¼ cup crème
  • 1 packet of gelatin
  • 2 Tablespoons of Vanilla Paste
  • 5 Medium Sized Mint Leaves
  • 1 Teaspoon of Sea Salt
  • 6 Larger Sized Purple Potato Chips (Plain or Ruffled)
  1. Place large bowl on countertop, fill half way with ice, then fill a quarter of the way with water, creating an ice bath. Set aside.
  2. Meanwhile, place a kitchen towel in a circle on the countertop. Place a medium sized bowl in center of circle, pushing towel just under bowl to keep bowl from moving.
  3. Place ¼ cup of crème into bowl. Add gelatin powder into bowl, whisk until gelatin is almost completely dissolved.
  4. Meanwhile, place ¾ cup crème in a small pot and whisk in 2 Tablespoons of Vanilla. Turn heat to high and bring crème to a boil. Remove from heat as soon as crème starts to rise up the sides of the pot. Whisk vigoriously to circulate vanilla and cool crème.
  5. Slowly pour vanilla-crème mixture into gelatin-crème mixture, while whisking, until completely combined and gelatin is dissolved.
  6. Place a sieve of chinois in a metal, medium sized bowl and slowly pour mixture through.
    Immediately place strained liquid in the large bowl-ice bath, slowly and gently stirring until steam stops rising from the liquid. Immediately remove from ice bath, cover with plastic wrap and place in the fridge to refrigerate at least 2 hour before service.
  7. 45 minutes before you plan to enjoy the Vanilla Bites, remove the vanilla mixture from fridge, mashing with a whisk and gently stirring to break up the gelatin mixture into small pieces.
  8. Drizzle in 1/8 cup crème, whisking until combined. Continue to drizzle remaining crème until vanilla mixture is a ‘fluffy’, ‘foamy’ mixture that is the consistency of ‘pudding’. Set aside.
  9. Stack mint leaves on top of each other and roll up tightly together to slice off in ‘chiffonade’ pieces. Set aside.
  10. Lay potato chips on cutting board and spoon out about 1 Tablespoon of vanilla foam mixture onto each chip, place chips on serving platter.
  11. Sprinkle Sea Salt over bites and around edges of plate.
  12. Sprinkle chiffonade of mint over bites and around edges of plate and serve.

11.17.2005

Recipe: Sweet Potato Bisque


This is a great fall style, sweet and holiday inspired soup that can be served with a dollop of marshmallow creme, honey sweetened yogurt or even mandarian oranges. This recipe serves 4-6.
  • 3 Tablespoons of butter, unsalted
  • 5 Sweet Potatoes, peeled and chopped into 2"x2" pieces
  • 1 large Baking Potato, peeled and chopped into 2"x2" (to help with thickness)
  • 5 cups low sodium chicken stock
  • 3 cups of heavy creme
  • a sprig of thyme
  • a few bay leaves
  • salt and pepper to taste
  1. Prep sweet potatoes.
  2. Heat butter in large pot, add sweet potatoes, then chicken stock and herbs.
  3. Boil potatoes on medium high heat until soft - about 30 minutes.
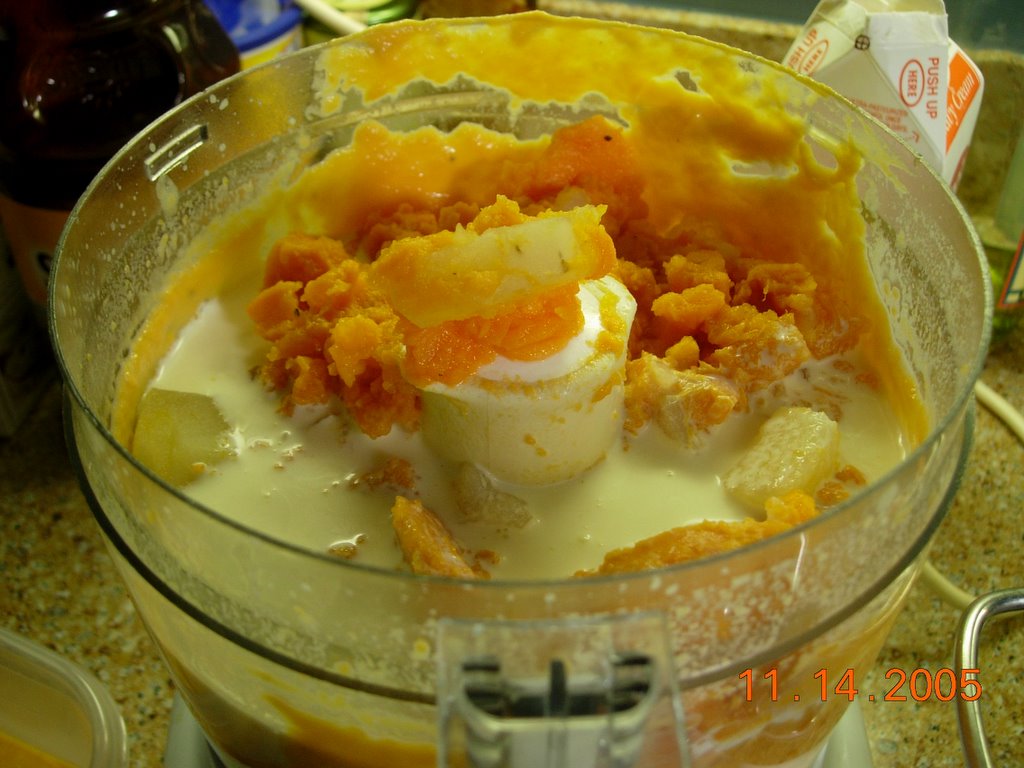
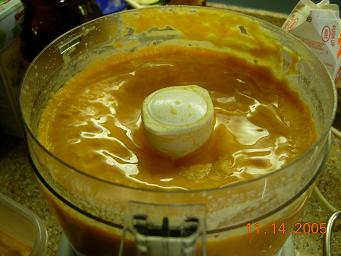
  4. Restrain potatoes and robocoup until smooth. Add remaining heavy creme to help robocoup soup into a smooth, silky consistency.
  5. Thin out soup to desired consistency with remaining heavy cream.
  6. Re-heat in pot before serving.
  7. Salt and Pepper to taste.
For some different sweentening ideas: Add 1/4 to 1/2 cup of honey to sweeten or thin out soup with freshly squeezed orange juice.

11.08.2005

Recipe: White Veggie Salad with Castelmagno Cheese

Recipe: Castelmagno - White Veggie Salad with Castelmagno Cheese (serves 1)
  • 2 oz. Castelmagno cheese, slightly crumbled
  • 2 t. White Wine Vinegar
  • 2 T. Italian Parsley, rustic chop
  • 1 Medium Parsnip, julienned
  • 1/2 bulb of Fennel, shaved
  • 1 Endive, julienned, centers removed
  • 1 large Turnip, brunoise or 2 small peeled & thinly sliced
  • 1 Leek, white only, sliced into circles
  • 2 T. brunoise Vidalia Onion
  1. Combine White Wine Vinegar, salt, pepper, evoo and parsley, emulsify, set aside.
  2. Blanch and shock parsnip and turnip and combine.
  3. Combine parsnip/turnip mixture with remaining ingredients and drizzle over then fold in gently dressing mixture.

Recipe: Poached Pears


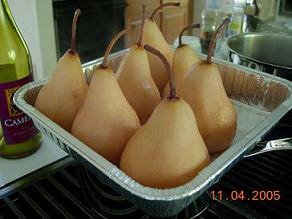
Simplicity is elegance when you serve poached pears with a cheese course or as a dessert. They are so easy to make and your guests/family will enjoy the sweet and fall spiced goodness.
  • 4-6 bosc pears (this is my particular favorite pear, but you can use any pear you like)
  • 1 cup white wine
  • simple syrup (1 part sugar: 2 parts water)
  • 3-4 star anise
  • 1 cup. sugar
  • 6-8 black peppercorns
  • 1 stick of cinnamon
  • 10 cloves
  1. Peel and cut about an 1/8 inch off the bottom, so they sit nicely in the pot and eventually, on the recipents plate.
  2. Place remaining ingredients and bring to a boil.
  3. Sit pears inside pot and turn down to a medium simmer.
  4. Cover pot with a piece of foil or parchment paper and simmer for 20-30 minutes until pears are fully cooked through (test with pearing knife).
Serve hot (by microwaving for 2-3 minutes before you serve them if you made them earlier in the day) or chilled (straight from the fridge).
For an extra kick, strain the cooking liquid of the spices and return to medium high heat to simmer until reduced to a sauce consistency/very thick. You can drizzle the sauce over the pears before serving for extra sweetness.