1.27.2006

Recipe: Caramelized Pineapple with Pomegranate Reduction

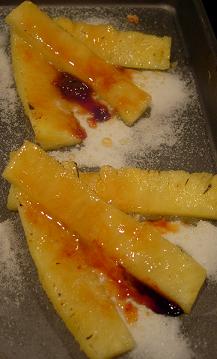
Caramelized Pineapple with Pomegranate Reduction

Don't cut treats completely out of your life because you want to be on a diet. Just replace your nightly ice cream ritual with some fruit - or even dress it up with a brulee torch.
  • Pineapple, sliced in long strips (3-5 inches), 1/2 inch slices
  • 2 Tablespoons of fine granulated sugar
  • 1 cup of POM Juice
  1. Pour your pomegrante juice in a small pot and bring to a boil. Reduce by 3/4 until it reaches sauce consistancy. Remove from heat and let cool.
  2. Lay out pineapple slices on sided cookie sheet (you may want to cover it with foil if you are worried about removing the caramel later).
  3. Get your torch ready and sprinkle sugar, very lightly over 1 pineapple slice, then torch that slice, continue with sugar, then torch on remaining pineapples. Let caramel cool enough to handle.
  4. Place pineapple pieces on plate and drizzle pomegranate reduction over and around pineapple to serve.
When you are brulee'ing pineapple, you don't want to do more than 1 slice at a time because the juice in the pineapple will absorb the sugar and once sugar is wet, it becomes nearly impossible to caramelize.

1.17.2006

Recipe: Asian Broccoli, Corn & Mushroom Stir Fry


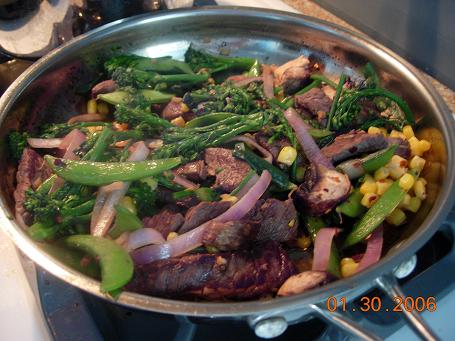
Asian Broccoli, Corn & Mushroom Stir Fry
(Serves 2)

A little asian marinates or oils can change a person who doesn't eat broccolini into someone that does.
  • 1/2 bunch of broccolini, blanched
  • 1/4 cup of fresh corn kernels (can be frozen)
  • 1 portabella, top skin peeled and chopped in bite sized pieces
  • 5-7 sugar snap peas
  • A few slices of onion (depending on your preference toward onions)
  • 1 Tablespoon of chopped garlic
  • A shake or two of red pepper flakes
  • 1 Tablespoon of sesame seed oil
  • Squeeze of lime
  1. Heat a wok or saute pan to high, when really hot, add a Tablespoon of Canola oil until hot and 'running' around the pan.
  2. Add the onions and saute until translucent, then add garlic and portabellas and saute until mushrooms have released most of their liquid.
  3. Add broccolini, sugar snaps, corn kernels, until heated through, then remove pan from heat.
  4. Dash in red pepper flakes, sesame seed oil and lime juice.

1.13.2006

Recipe: Apple Quesadillas


Apple Quesadillas:

A great healthy subsitute and fabulous on the indoor or outdoor grill.
  • Whole Wheat Flour Tortillas (2 per quesadilla)
  • 2 Tablespoons of Light or Fat Free Sour Cream
  • 1/2 cup of low fat shredded cheddar cheese or chipotle flavored
  • 1/4 apple, thinly sliced
  • 1 Tablespoon of parsley

  1. Lay out tortilla and spread sour cream, 1 tablespoon per side.
  2. Sprinkle cheddar on 1 side, then fan out apple slices.
  3. Top with other side, making a sandwich.
  4. Throw on grill for 4-5 minutes until cheese is melted and quesadillas are char-grilled.
And if you don't feel like going on a diet - subsitute the cheddar cheese for 4 oz. piece of brie, chopped up into small pieces and spread around the 1 side of quesadilla.

1.03.2006

Restaurant Review: Mini Bar at Cafe Atlantico


Wow. Wow. Wow! That is all I can say about Mini Bar in Cafe Atlantico (and you may note that the web developer of all of Jose Andres websites designed my new work site as well! Fine Dining Solutions). If you are a true 'foodie' and you love experimenting with food and trying new and different things and you HAVEN'T been to Mini-Bar - you are missing out.

Mini Bar is small set of 6 stools, behind a small bar of 2 line cooks. These guys do this 'show' every Friday and Saturday night at 6pm and 9pm, sadly the show is the same at both times and the restaurant only changes out 1 or 2 courses every 3 months or so, therefore it makes it difficult to come back and visit often (I guess a visit every 3 years or so will make it a new experience?) but 1 time is enough for a while and it really gives you the 'umf' that makes interesting and 'chemical' cooking really interesting. As you read on....you'll know what I mean.....

Do make your reservations asap - I've heard they only take 6 weeks of reservations at a time; then you give a non-refundable deposit; sign a contract you have to fax back to them promising you have no food allergies and that you will come....But IT IS WORTH IT...

32 'mini-courses' - all good - and most very interesting....Here are few highlights:

A Cesear salad - completely deconstructed and piled into sushi rolls.

A small bite of foie gras wrapped in cotton candy - sweet and delicious!

A lobster bite - They asked you put the whole piece of lobster tail in your mouth with the end of the plastic squeeze thing - then squeeze the roe end and you were injected with wonderful rowe while you chewed and swallowed a butter-poached piece of lobster tail.This was beyond cool - first they puree'd the peas and ran them through a chinois, then put them in syringe, where they make dropplettes of 'pea juice' into a calcium liquid mixture that naturally created a chemical reaction that creates a very light coating around the pea liquid, literally creating pea 'droplettes' or new peas -or what they called the dish: Pea Caviar.

This was my husbands favorite: Philly Cheesesteak. Thinly sliced Japanese Mishima beef on top of a pita, fried and in the shape of a cornacopia, that is filled with vermont cheddar-truffled pastry creme. This - did not suck.

Recipe: Truffled Gratin Potatoes


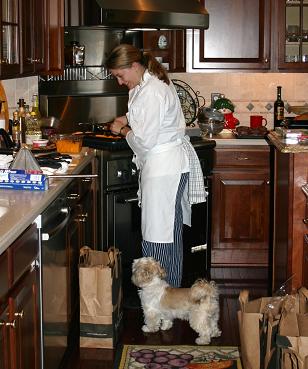
I often tell clients that I would appreciate it if they limited their time to the kitchen while I am working. Although sometimes, I need a kitchen assistant and who could be better then a sweetheart like Baily as you see here helping me out in the kitchen the other night on New Years Eve. Baily is a great helper and it was really great having some company in the kitchen while I prepared his families New Years Eve dinner.
Here is a recipe from the event that I think you will enjoy. I also included some directions on how to prepare the gratin over 2 weeks ahead of time and then re-heat it 'personal chef' style - and believe me, no dinner party guest will ever be able to tell.
Truffled Gratin Potatoes:
(Serves 4-6)
Ingredients:
  • 2 Cups Heavy Cream
  • 2 Tablespoons of Unsalted Butter
  • 8 Baking Potatoes, Skinned and Sliced on a Mandoline (Thinnest Setting Possible)
  • Salt and Pepper (to taste)
  • 4 oz. Truffle Oil
  • 6 oz. of Gruyere Cheese, Shredded
  • 4 oz. of Parmesan Cheese, Shredded
  • 2 Tablespoons, Finely Chopped Black Truffles (from a Can)
To Make Truffled Potato Gratin:
  1. Preheat oven to 400 degrees.
  2. Prepare gratin baking dish: For a tall gratin, use a bread pan. For a shallow gratin, use a 9”x9” square pan. Cover pan with 1 large piece of foil and fold over sides of pan. Spray foil with non-stick cooking spray, whip out any excess and set aside.
  3. Pour crème into large bowl and set aside.
  4. Cut up butter into ‘pea’ size pieces and set aside.
  5. Peel potatoes and place in large bowl filled with water, so that potatoes are completely submerged.
  6. Put mandoline on thinnest setting possible and lay over crème filled bowl. Remove 1 potato at a time from the water bowl and slice potato through mandoline into crème. Between each potato, carefully flip slices in bowl around to make sure each is coated with crème.
  7. Pour truffle oil into a shallow bowl and set aside.
  8. Place gratin dish in front of you and start to layer in potato slices. First fan slices, overlapping each by half, from left to right. Sprinkle lightly with pepper, salt and about 2 Tablespoons of gruyere.
  9. Continue with next layer of gratin from top to bottom, followed by a light brushing of truffle oil over the potatoes and sprinkle 2 Tablespoons of shredded gruyere.
  10. Every third layer of gratin, place 3 pea sized pieces of butter evenly over gratin and sprinkle about a tablespoon of chopped black truffle over gratin and gently press down on gratin to insure you are stacking the layers as tightly as possible.
  11. Alternate gratin directions 7 and 8 until you finish with last of the potatoes or ½” from the top of the gratin dish, whatever comes first.
  12. Top with parmesan and chopped black truffle, place gratin dish on a sided cookie sheet and place in oven to bake for 30-45 minutes.
  13. To check doneness of gratin: Remove from oven and run butter knife through center of gratin; if knife slips through with little to no resistance, gratin is ready. If gratin is becoming too dark for you: Cover with foil and return to oven until cooked through.
  14. Remove from oven, slice into desired pieces and lift out with spatula.
To Store Truffled Potato Gratin: Remove gratin from oven and let cool completely. Carefully ‘lift’ out foil from gratin pan – and place on cutting board. Using a slicer, carefully slice gratin in desired pieces and place in Tupperware. Sprinkle each piece with a little gruyere or parmesan and cover to refrigerate (for up to 5 days) or freeze (for up to 2 weeks).

To Serve Truffled Potato Gratin: If gratin has been frozen, please defrost it in the fridge at least 24 hours before you plan to re-heat it to enjoy. Remove Tupperware top and cover with a paper towel. Place in microwave to heat for 3-4 minutes until heated through and butter knife slips through center of gratin with little to no resistance.

12.30.2005

DC Restaurant Week (Janurary 9th-15th)

Another DC Restaurant Association Restaurant Week starts on January 9th and runs till the 15th. Restaurant week is a great way to (1) Visit expense restaurants for cheap (2) Try out a restaurant you aren't too sure about (3) or just go out to dinner really cheaply - $20.06 3-Course Lunches or $30.06 3-Course Dinners - to all your favorite restaurants!

Make your reservations ASAP because the good restaurants fill up fast.

Here are my reservations for this DC restaurant week:

  • Sushi Ko
  • Willow Restaurant
  • Inde Bleu
  • Cafe Atlantico
  • Tosca Restaurant
  • Zatinya
  • Looking for some more information?


    12.28.2005

    Recipe: Creme Brulee


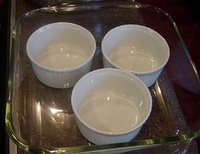
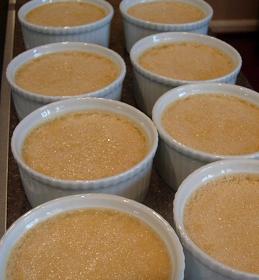
    The creme brulee is probably the most popular dessert in Europe and America - simply because it is difficult to visit a fine dining establishment that does not offer a version of it on the menu. It is so popular simply because it has it all: yummy, rich custard, utlra creamy and tinted with whatever flavor you desire (usually vanilla); hidden under a layer of sweet, crunchy caramelized sugar (picture to left has brulees that have not been brulee'd yet), cutting and complimenting the richness of the custard. After writing this, I could have one right now....
    Another thing you probably didn't know is that you can prepare creme brulees days in advance and just brulee (burn the tops) them right before you want to serve them. If you didn't know - 99% of all restaurants make their creme brulees like this. Some even brulee them hours before you order it and just stick it in the fridge. Sad but true. But then again, if they do it why can't you? Therefore I have added some storage and re-heating tips to this recipe.
    Creme brulees are super impressive to serve at your next dinner party - and they are much easier to make than you think - really it is only about 15 minutes in kitchen time and then you can pop them in the oven and go on your way.
    BUT - there are only a few things you must do to ensure that you make great creme brulees:
    1. Take the temperature of your oven;
    2. Place a thermometer in your oven and turn your oven to 300 degrees. Check it 20 minutes later and see if the thermometer says 300 degrees;
    3. Then check the oven 40 minutes later and ensure that it still says 300 degrees.
    I know you think I am joking, but a oven that is 20 degrees too hot - and you will end up with scrambled eggs, floating on the top of warmed vanilla milk in your creme brulee dishes...and if your oven is 20 degrees too cold, you're brulees will take 5 hours to cook or may never even cook at all.

    Makes about 8 Standard Individual Creme Brulees
    Ingredients:
    • 2 c. heavy crème
    • 6 yolks
    • 2.5 oz. sugar (about 3/4 c.)
    • 4 T. vanilla (I like the paste, you get the seeds and the intense vanilla flavor of the extract)
    • liquor (optional - but a few tablespoons of grand mariner sure gives it an elegant punch)
    1. Preheat oven to 300 degrees.
    2. Lay out 8 brulee dishes in a sided, oven safe, casserole dish; then pour water into the casserole dish, making the water at least a 1/4 inch to a 1/2 inch deep.
    3. In a bowl, whisk eggs, sugar and liquor together until combined. Set aside.
    4. Warm creme on stove top until it starts to bubble over, remove from heat and let cool for a minute or so.
    5. Wrap a towl around your egg-sugar mixture bowl and place it on the counter - simply to keep your bowl from moving around. Slowly pour the warm creme into the egg-sugar mixture while whisking the egg-sugar mixture, making sure that the creme is combining and emulsifying completely.
    6. Using a wooden spoon, gently stir the custard for a minute or two - this will allow the air bubbles to rise to the top and pop, so you'll have smooth and creamy custard without air holes later.
    7. Ladel custard into creme brulee containers, leaving only an 1/8 inch at the top.
    8. Place in oven to bake for about 30 - 45 minutes until completely set and when touched in the center, the custard is 'springy'.
    9. Remove from oven and let cool.
    10. Wrap each individually in plastic wrap and refrigerate. These will be fine in the fridge for up to 4 days.
    11. When you are ready to enjoy. Remove from fridge and sprinkle 2 Tablespoons of granulated white sugar on top of 1 brulee, spread out the sugar so it is evenly coated on the custard.
    12. Start your torch and slowly move the torch (about 1 1/2 inches from the custard) in a circular motion around the brulee until all the sugar is crystalized.

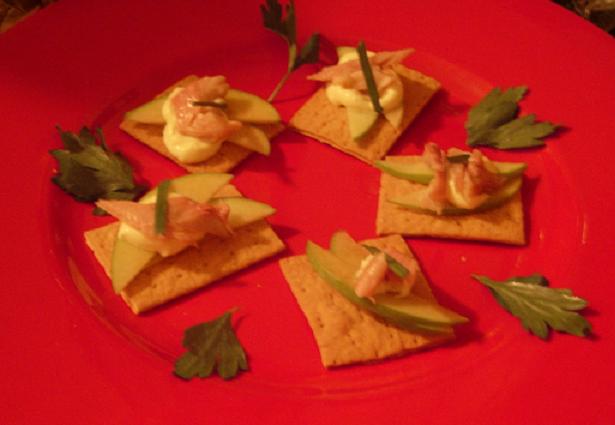
    Recipe: Smoked Trout & Apple Bite


    A very popular appetizer that takes 2 seconds to prepare and has quite a punch of flavor with the smoky trout and sour granny smith apple.
    Makes 10-20 (depending on how big you make them)
    Ingredients:
    • Smoked Trout (1 small fish)
    • zest from 1/2 lemon
    • picked parsley leaves (for garnish)
    • snipped chives (2 chives)
    • 1 granny smith apple (quartered and thinly sliced on mandoline)
    • 1 teaspoon of creme fraiche per bite (1 - 8oz. package of creme fraiche)
    • crackers (light and plain in flavor - I enjoy these starr ridge crackers, specifically olive oil flavor - they are mild with a great olive oil after taste)

    Pile cracker, a few slices of apple, a little piece of smoked trout, a dollop of creme friache, a pinch of lemon zest; topped with 1 inch snip of chives. Garnish plate with parsley leaves. You're done!

    12.02.2005

    Event: James Beard Greens Event

    If you are in NYC on December 11th, you might want to include their next Greens event on your calendar.

    The greens are a sub-group within the James Beard Foundation, originally put together for young 'foodies', it has developed into an 'it' party for young foodies in NYC.

    The menu sounds fabulous and you get a chance to taste a bit from some of the up and coming chefs are NYC for a limited price!

    For more information and to purchase tickets, go online to James Beard Foundation Greens Event Page.

    Here is the menu that they emailed me (and isn't it interesting that only 2 restaurants have a website - what is it with the restaurant industry? They just haven't realized the value of the internet I guess):

    • Saul Bolton, Saul, Brooklyn, Foie Gras Bon Bon with Toasted Hazelnut and Sauterne Jelly, Mini Veal Boudin Blanc with Pickled Cabbage, Sardine Escabeche
    • Heather Carlucci-Rodriguez, Lassi, NYC, Kala Chana Somosas with Boondi Raita, Kofte Saag (lamb meatballs with spinach puree), Cardamom Custards
    • Amanda Freitag, Sette Enoteca e Cucina, Brooklyn, Parmesan Fritters, Tuna Crostini, Pumpkin Ravolini, Swordfish Involtini
    • Jordy Lavanderos, Secretes, NYC, Chestnut Soup Shot Topped with Celery Root Foam and Caramelized Celery/Jamon Serrano Nibs, Roasted Butternut Squash Ravioli Stuffed with Smoke Shallots Puree, Orange/Ginger Duck Confit and Pickle Radish Brulee, Deconstructed Cheese Plate on Caramel Squares
    • Julie Taras and Tasha Garcia, Little Giant, NYC, Peppadew Peppers with Marinated Goat Cheese, Chicken Liver Mousse and Fig Onion Compote, Peppermint Whoopie Pies
    • Pichet Ong, Consulting Pastry Chef, Spice Market and 66 and future chef/owner P*ONG, NYC,Kabocha and Pear Walnut Crisp with Caramel Ice Cream, Banana Yogurt Cake with Chocolate Honey Buttercream
    • Michael Waterhouse, Master Mixologist of Dylan Prime and Devin Tavern (coming soon), NYC, The Big Apple, HO-HO Collins, Tiramisu Cake-tail

    Wines and Beer:
    2004 Bottega Vinaia Pinot Grigio (Trentino, Italy)
    2004 Grove Mill Sauvignon Blanc (Marlborough, NZ)
    2004 Feudi di San Gregorio Falaghina (Campania, Italy)
    2004 Navarro Correas Malbec (Mendoza, Argentina)
    2003 Faustino VII Rioja (Rioja, Spain)
    2003 Jean Luc Colombo Cotes du Rhones Les Forots (Rhone Valley, France)
    Wines courtesy of Palm Bay Imports
    Bass, Stella Artois, Leffe and Hoegaarden Beers

    11.30.2005

    Article: So You Want to be a Personal Chef?

    My personal advice to those considering a personal chef business:

    1. Get certified. Get Educated.

    If you want to be taken seriously by not only your customers, but your peers – get certified and educated.

    Part I: A (personal service or catering) business license, appropriate (catering or personal chef) insurance, your local food safety management certification through the National Restaurant Association Educational Foundation and then of course, following the regulations and local city or county laws.

    Educate yourself on local liquor laws, food transportation issues, etc. I would never hire or take seriously a caterer/personal chef that doesn’t carry insurance or tells me how they deliver their meals out of a cooler in their Pathfinders trunk. True stories!

    Part II: If you don’t have a culinary degree or business experience, get some through your local community collegue, culinary school, culinary class outlet, local foodie clubs, associations and non-profits.

    Listening to others experiences, gaining basic knowledge about accounting, business management or even cooking techniques. These gain you experience ‘in the field’ without even doing an actual ‘cook date’. They also help you build collegue references and give you an opportunity to ask all the questions you need answered about the ‘logistics’ of being the food business.

    I will also insert into this section that it is probably important to join a personal chef association only if you have no idea how a daily personal chef business works. Most personal chef associations make you pay a horrible fee to be a member that allows you to get introductory information about the business and a listing on their website list of members. You need to decide for yourself if having an outline of what a day in the life of a personal chef is like is worth $500-$1500 for the first year and $150-$350 per year after that.


    11.28.2005

    Tip: De-Seed a Pomegranate

    Pomegrantes are the new 'haute' of cuisine, especially now that they are in season. You can easily drop $3 bucks on one of those snowman shapped juices and $8 bucks on the nuevo pomegranate molasses.

    But can you get out those pretty little seeds without making a mess or loosing half the seeds to the juice on your cutting board gods?

    Scaning over some pomegranate salad recipes for a client, I was horrified to learn that Nigella recommended cutting into your pomegranate with a knife, and just remove the seeds that weren't broken!?! That would be like cutting into an orange and then trying to remove the segments, without spilling any juice or wasting any segment?!? I started googling around found that most recommended this (even the site: http://www.pomegranate.org/nomess.html which I thought was a little funny).

    Therefore I thought I would make the apparent top secret way to de-seed a pomegranate known.

    I learned this trick from a persian chef who has probably been cooking with real pomegranates longer then I have known what a pomegranate even was.

    1. First, using a sharp pairing knife, you want to cut a 'curly cue'. Like you are cutting away the peel and pith from an orange without getting the segments of juice - but all in one long curly cue line. from the top of the pomegranate to the bottom. You are only cutting in about an 1/8th inch, just through the pith, with the intention of not cutting into any seeds. Take your time, this is the most imporant part of the process and will decide if the rest of the process is 'juice free and easy' for you.
    2. Carefully working around the pomegranate, loosen the cut you made, pulling the cut open about a 1/4 inch or so.
    3. Now you can pull the pomegranate apart easily, into sections.
    4. Take a section and hold it in one hand, you can run your thumb along the seeds, bending them back and forward gently to have them 'pop off' the pith.
    5. If you run into a section that is covered with a lining of pith, just peel it away before popping off the seeds from that section.

    Other tips:

    • You want to remove all the pith, even the little dots of it that stick to some of the seeds. It tastes like eating orange pith.
    • You don't need to wear gloves - you aren't going to make a mess right? And if you get a little juice on you, just wash your hands off and then return to pomegranate peeling bliss.


    11.27.2005

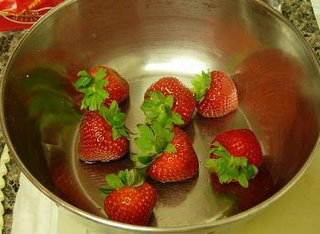
    Recipe: Chocolate Covered Strawberries


    Talk about easy...impressive...and everyone loves them.
    You cannot fail at these at long as you use good quality chocolate (here is a great website that explains everything you would ever want to know about chocolate and more importantly, quality chocolate), don't burn it and fresh strawberries that aren't over ripe.
    I will not go into the 'tempering' of chocolate - as that is a whole article in itself. I'll just say that tempering chocolate is esstentially breaking down the chemical compond of chocolate with a varied degree of temperature in order to produce (melted) chocolate that will eventually harden, therefore producing the chocolate in a new 'chemical state' for the baking purpose you desire. Yeah, I think most pastry chefs study this stuff for weeks - then putting it in practice is a whole different thing! Here is a quick an easy few paragraphs to read if you are interested about tempering. I googled around for a more serious description, but most were more generalized them what I mentioned above. So I guess that gives me something to write an article about later.

    Recipe: Chocolate Covered Strawberries
    • 11 oz. or more (is enough to double-dip 8 medium sized strawberries)
    • 8 Medium Sized Strawberries
    1. Wash and dry your strawberries.
    2. Set them on a sheet tray, covered with wax or partchment paper.
    3. Place a sieve inside a medium sized pot. Fill up the water in the pot so that the water line sits just below the sieve.
    4. Place the pot on the stove and bring to a boil.
    5. Meanwhile, chop up chocolate into very small pieces - no larger than a tablespoon.
    6. Place the chocolate in a metal bowl (that will fit nicely in the sieve).
    7. When the water is boiling, place the chocolate filled bowl into the sieve and let the chocolate melt.
    8. After a minute or two, gently stir the chocolate, moving it around the bowl, scraping the edges, helping it melt and circulating it, so that it doesn't burn.
    9. When 90% of it melted, remove the bowl from the sieve and quickly dip the strawberries into bowl, covering 80%. When you pull out the strawberry, give it a little shake to remove any excess chocolate, then lay on sheet tray. Continue with remaining strawberries.
    10. Let the strawberries sit at room temperature (around 65-70 degrees) until you plan to serve them (within 6 hours).
    You are welcome to double-dip the strawberries. Just wait about 15 minutes after the first dip - while the first layer of chocolate starts harden. Then heat your chocolate again over the boiling water and do the process over again (steps 7-9).

    Recipe: Mascarpone Stuffed Dates


    Recipe - Mascarpone Stuffed Dates
    Ingredients:
    • 6 Dates
    • 6 Tablespoon of Mascarpone
    • Salt and Pepper
    • Chives, Chervil or even minced Candied Orange Peel for Garnish
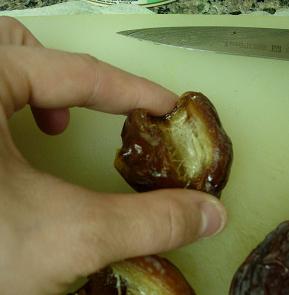
    1. Using a pairing knife, cut half way through the date, from tip to tip.
    2. Pinch the ends of the date, so it opens up and you can easily remove the seed.
    3. Prepare piping tip in bag and fill with mascarpone.
    4. Fill dates from tip to tip with about 1 Tablespoon of Mascarpone per date.
    5. Snip chives into ½ inch pieces.
    6. Place chives on top of mascarpone, in an ‘X’ for garnish.
    Refrigerate until about 1 hour before you plan to serve, then remove and let come to room temperature.

    Other ideas for serving this?
    • Use a piping tip to change the shape of the mascarpone in the date.
    • De-seed dates, place in oven at 400 degrees for 8-10 minutes. Remove and let cool enough for handling. Fill with mascarpone and serve slightly warm.
    • Great as a petit four or on a cheese platter.

    Recipe: Vanilla Bites


    This recipe is an adaption from the Book Amuse Bouche by Rick Tramonto. It really is a great example of combining all tastes (sweet, sour, bitter, salt) to form a perfectly flavored bite.
    People either love it or hate it - and it is usually only loved at dinner parties where the eaters are adventurous - so you might want to take what can your guests are before serving this.
    Recipe - Vanilla Bites:
    • 1 ¼ cup crème
    • 1 packet of gelatin
    • 2 Tablespoons of Vanilla Paste
    • 5 Medium Sized Mint Leaves
    • 1 Teaspoon of Sea Salt
    • 6 Larger Sized Purple Potato Chips (Plain or Ruffled)
    1. Place large bowl on countertop, fill half way with ice, then fill a quarter of the way with water, creating an ice bath. Set aside.
    2. Meanwhile, place a kitchen towel in a circle on the countertop. Place a medium sized bowl in center of circle, pushing towel just under bowl to keep bowl from moving.
    3. Place ¼ cup of crème into bowl. Add gelatin powder into bowl, whisk until gelatin is almost completely dissolved.
    4. Meanwhile, place ¾ cup crème in a small pot and whisk in 2 Tablespoons of Vanilla. Turn heat to high and bring crème to a boil. Remove from heat as soon as crème starts to rise up the sides of the pot. Whisk vigoriously to circulate vanilla and cool crème.
    5. Slowly pour vanilla-crème mixture into gelatin-crème mixture, while whisking, until completely combined and gelatin is dissolved.
    6. Place a sieve of chinois in a metal, medium sized bowl and slowly pour mixture through.
      Immediately place strained liquid in the large bowl-ice bath, slowly and gently stirring until steam stops rising from the liquid. Immediately remove from ice bath, cover with plastic wrap and place in the fridge to refrigerate at least 2 hour before service.
    7. 45 minutes before you plan to enjoy the Vanilla Bites, remove the vanilla mixture from fridge, mashing with a whisk and gently stirring to break up the gelatin mixture into small pieces.
    8. Drizzle in 1/8 cup crème, whisking until combined. Continue to drizzle remaining crème until vanilla mixture is a ‘fluffy’, ‘foamy’ mixture that is the consistency of ‘pudding’. Set aside.
    9. Stack mint leaves on top of each other and roll up tightly together to slice off in ‘chiffonade’ pieces. Set aside.
    10. Lay potato chips on cutting board and spoon out about 1 Tablespoon of vanilla foam mixture onto each chip, place chips on serving platter.
    11. Sprinkle Sea Salt over bites and around edges of plate.
    12. Sprinkle chiffonade of mint over bites and around edges of plate and serve.

    11.21.2005

    Advice

    A lot of people email me for recipes, jobs and even advice on how to be a chef or start their own Personal Chef business. So in the next few posts, I have put together some ideas on the matter.